Showing posts with label FO. Show all posts

Apr 7, 2015

Project Round Up

I have finished those Anna and Elsa dolls that I spoke about here. No formal pattern was written up really. I did write something for Anna's cape, but it's not edited and I'm not sure it's really that fantastic.

I've made a baby blanket for my dear friend who has recently become a new mommy to a cute little baby boy. I'll also dug deep and made a pillow with his initial sewn on with buttons. You can see the project details here.

I'm obsessed with granny squares, but not the traditional ones. So I've started producing some 5" squares in baby weight yarn for the guest room bed to get a decent sized blanket on it.


I jumped on the band wagon to make the Cowl Neck Poncho....but...I'm not sure yet how it will turn out. I don't have too much left on it, maybe just a few rows...but it's not coming out exactly right and I'm not sure if blocking will do the job either. So I've kind of stalled on it until I decide to frog or finish and try to block. It's acrylic, so once I block it...I will kill it. Project details here.

I finished a crazy shawl pattern that I was dying to make for my sister. She is really into dragons and so this pattern was just perfect. I talked about it briefly in the fall. I pulled it out and restarted twice before I finally got something remotely close to the gauge in the pattern. Considering that you have to count to more than 600 for the starting chain, it was a valiant undertaking. Project details here.
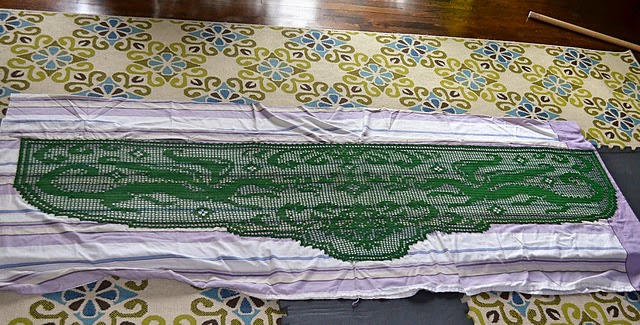

I finally completed a baby blanket for Lily that has been hibernating since Spring last year. It just needs the ends tucked in and a decent blocking. I love the way it came out and it's bigger than just a regular baby blanket, so she can use for a number of years. This pattern is somewhat made up by me, using a stitch for the green from mypicot. Project details here.

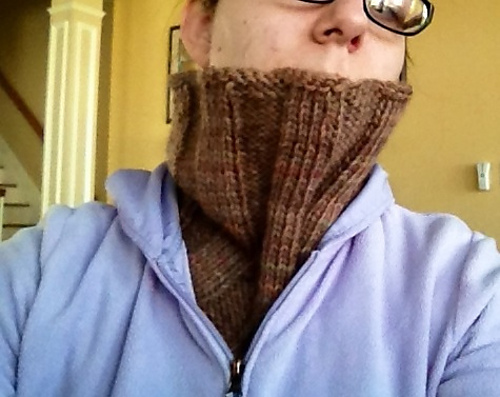
I made a cowl for a friend of mine and she just loves it. I can't tell you how happy it makes me when I make something for someone and they actually use it. I was careful to send her a list of patterns that I could and would make along with some yarn suggestions from my stash....I had to hedge my bets that she would like, you know....Project details here.


I made a sweater for myself in the early fall. It was a fairly easy project and it's a really nice addition to my closet for the fall and spring weather. Project details here. Apologies for the sad looking cell phone shot...I never remember to get a picture with my real camera.


Apr 30, 2014

WiP Wednesday - FO Edition & Home Update

Although I have a new WiP, I didn't get a chance to spread it out properly and get pictures, so instead I will show what I have totally finished....there was a few FOs that needed to be blocked and finally I got around to it this week.

My maternity leave has been a whirlwind of appointments, household chores, and cooking for after the baby comes.  I have to say I've done really well with that.  I've gotten lots of batches done and in the freezer.  All together I think I will have cooked about 22 lbs of chicken and 26 lbs of beef.  I did not keep track of the pounds of veggies that goes with all of this though.  Needless to say it was an expensive up front cost, but to keep us all fed and healthy for the first couple of weeks with a newborn at home, it was worth every penny and the hours on my feet, in the kitchen.

But I did squeeze in time to knit and crochet, and you will get to enjoy seeing the fruits of that labor....

Serriform Shawl :


Apr 15, 2014

Dress FO

This dress is adorable and I could probably make hundreds of them.  It's so easy to customize, if you choose and it can be worn as a little jumper or just as a dress with a onesie underneath for warmer weather.

This is the second pattern from her site that I've made and she really has quite a good collection going over there.

My modification for the pattern making itself, was to join in the round after Row 6.   What I will do with it for wearing, is flip it around so that the open part will be in the front and tied with a ribbon.  I might even trade out the ribbon for buttons and then do a ribbon woven around the "waist" and tied in the front.  We'll see, as I really dislike sewing on buttons.

This pattern is the Angel Wing Pinafore by Maxine Gonser.  My Ravelry project page.


Apr 3, 2014

Sweater FO

Now that I've finished the world's most boring blanket...I'm so sick of that stitch, I have started and finished a baby sweater.

I just love this pattern, the Wrap Diaper Shirt.  I had made one for Ethan and now I have made one for my little lady, Lily.  Here is my Rav Project Page.

This flies off the hook and it literally, only takes a few hours.


Jan 27, 2014

FO, FO - Yay

My Starke Scarf is all blocked and pretty.  Too bad I'm all chubby in the picture, but alas, that comes with pregnancy.


Jan 15, 2014

WiP Wednesday - Starke Scarf

This worked up really fast, now I just need to block it....I think I will go with the hang it on a hanger, wet with some clothespins on the edges....

The only comment I have about the pattern concerns the cast on row of foundation hdc.  It's a rather stretchy way to start something, but with the chaining throughout the rows, the body of the scarf is tighter than that starting row.  I'm not sure it really matters, but it might be better to start with chaining with a larger hook and then doing a regular hdc row with the hook you plan to use throughout.

Here she is in all her unblocked glory, blocked photos to follow at some future point.


Aug 29, 2013

Thursday Weigh-In

So much going on....sometimes it's hard to stick to a diet plan.  Sometimes you even outright, resent being held accountable to an online computer program telling you how you should eat, but you stick with and you lose another pound and you realize that it's all worth it.

WW Stats:

SW : 148.2 lbs

GW : 130.0 lbs

CW : 129.3 lbs

WL : -1.0 lbs

Notes:  Well, I did it.  I'm finally here.  Now I just have to come to terms with what it really means to be at a healthy weight and to struggle with maintenance.  
In some ways I'm happy to have made it and in another, I'm disappointed with the outcome.  I guess I had some unrealistic Victoria Secret model body in my head...alas...I did not grow any taller, so I need to brain training and try to just accept things as they are.  
I will continue to work out and hopefully, I will grow some muscles and lose some jiggle...fingers crossed ya'll.


Aug 14, 2013

WiP Wednesday - FO Edition

Another FO from long ago.  I made this bag in 2010 for my sister.


It went really really fast, probably took longer to block it, sew it, and put in the liner than to actually crochet the bag.

I added a little cell phone case and attached it to the strap.  I also put a little button and made a loop to close the top a little bit.

It's called the Caracas Bag and it's FREE FREE FREE...my favorite kind of pattern.

Here is a link to my Rav Project Page.


Aug 12, 2013

Monthly Menagerie - July 2013

Better late than never....


JULY 2013


Aug 7, 2013

WiP Wednesday - FO Edition

I feel like showing FO's is a bit of cop out, but I kind of enjoy doing it, especially since I haven't really done it before AND I get to show you some really great patterns and projects that I loved and didn't talk about here.

Next up is what I call the Barbayanni blanket.  It was made for my cousin's baby boy.  I loved everything about this project.


The colors, the pattern, and the final product.

The pattern is SmoothFox's A Whole Lotta Holes.  It was soooo easy and I flew through this blanket.  Now the "white" is actually a pale blue as it's a marl of medium blue and white.  It's not easy to capture it with the camera that I had at the time, so you'll have to take my word for it.  OR you can head over to my Ravelry Project Page and have the ability to zoom in closer to the pictures.

Let me talk a little bit about SmoothFox.  Here is the link to her blog.  Her patterns are awesome and she offers soooo many for free.  I follow her blog and I love seeing all her testers show off their FOs for the billions of patterns that she releases.

So, in conclusion, if you require a blanket pattern that is super fast and super easy, then this is the one for you.  It literally took me 11 days and that's working a full time job, to finish this.  That means only an hour or two a day at the most to finish.  Also, I washed and blocked it, which is included in that time.  ALSO I used baby yarn and an "H" hook!!  GO !  Make One!

Jul 31, 2013

WiP Wednesday - FO Edition

Things are a bit busy for me at this time and so I haven't had much time for the things that require a bit of concentration from me, ie. crafting.

So, for a little while, I think that I will show some FOs here and talk a little bit about that project.

As for WiPs, I do have a few....the TTL KAL isn't completed, but it's about half way through.  The WendyKnits Summer KAL has the yarn all ready, but no needles...aka...not started...I'm really sad about that.  Once our basement renovation is completed, then I can unpack all my yarn supplies and hopefully come across my needle pile.
Olive Basket is still on hold, which was the plan so that I could work on my Mad About Tosh Club projects.

Ok, so today's FO: Seraphina Shawl


I don't know why I have not posted about this before, but this pattern was AWESOME.  I've never crocheted something so big, so quickly and loved the result so much.  This pattern is crazy easy to memorize and I literally zipped right through it.  Blocking is completely necessary with this project, but the blocking helped to really open up the shells and give it a better overall shape.

Best part....the pattern is totally free!

Here is my Ravelry Project Page and the Seraphina Pattern itself.

Jun 29, 2013

Free Purse Tutorial

I'm reluctant to call this a pattern.  I don't plan to proofread or edit this and I don't plan to make any corrections.  This is just a loose set of instructions to make this bag.


(Editted to add): Here is my project page on Ravelry.
Link to the Pattern on Ravelry.

I used all acrylic yarn because it's easily washable and durable and doesn't stretch as badly as cotton.

I used about 250g of Worsted Weight.

With I Hook, chain 49.

Round 1 : hdc in second chain from hook and all the way across, 6 hdc in last chain and working on the bottom of the chain, hdc across, 5 hdc in first chain, join w. sl st to top of chain 2

Round 2 : ch 2, hdc in same st and in each across, 2 hdc in each next 5 hdc, hdc in each st across to last 4, 2 hdc in each, join w. sl st to top of chain 2 (chain 2 counts as a stitch)

Round 3 : ch 2. hdc in same st and in each across, once you get to the area where you have 2 hdc in each stitch, 2 hdc in each next 8 (or 9) sts, hdc across, to last 7 (or 8) groups of 2 hdc, and work 2 hdc in each, join w. sl st to top of chain 2

Notes:  At this point, depending on your gauge, you need to make sure it's flat and not wavy, so you may need to do more or less "2 hdc to 1 stitch" groups.

Round 4 : Here is where we begin working the body of the bag; ch 3 (counts as a stitch), dc BLO  in next st and all the way around, join w. sl st to top of chain 3

Round 5 : Ch 3, dc in next st, dc dec over next two stitches, dc to other "end" of the bag, where the curve is and somewhere near the middle do another dc dec over two stitches, dc across and sl st to top of beg chain 3

Round 6 - desired length : Repeat rounds 4 and 5 alternating until you reach your desired length and/or width
I did this until my bag was about 12" high, but if you keep going it could get very narrow, so keep an eye on width and stop the decreases once you're happy.  You can also not do any decreases at all if you want it to be straight on the sides

Last round : ch. 1 and sc in each st around, join with sl st to chain 1 and fasten off.

Handles

Spacing - measure the width at the place where you want to put the handles, for me it was about  1.5" down from the top of the bag.

16" - so, 4.5" in from the two edges of the bag I joined the yarn by sl st around the dc in the row, sl st around next 3 sts, 4 sts total

Chain 2, turn, hdc in next 3 sts, turn.

Repeat last row until strap measures 22", sl st to the body of the bag on the same side, make sure that the strap isn't twisted.  I attached it at about 4.5" from edge

That's it, weave in your ends and you're ready to go...!  I might line it with some fabric...we'll see.

May 1, 2013

WiP Wednesdsay - Oaklet Shawl

My Oaklet Shawl is all done...we'll see how long it takes me to block it.  I still haven't even blocked my last project....

I'm a little worried that it won't loosen up with blocking, but hopefully after a good soak the stitches will ease.  I tend to knit tightly and I debated going up a needle size, but we shall see.

I switched colors near the end because I knew that I would not have enough of the Tosh Sock.  So I dug through my leftover fingering yarn and realized that I could use the Tosh Merino Light that I had from my most recent project, the Serriform Shawlette.

I was a bit nervous about how they would play together, but over all, I'm happy with the result and I can't wait to soak it and pin it....

I will have to have a Ta-Dah post once I get this all blocked out and the weights of the yarn measured (yes I'm THAT lazy).

Here she is in all her crinkly, unblocked, glory:


Apr 22, 2013

PCH - Countertop Faux Granite Finish DIY

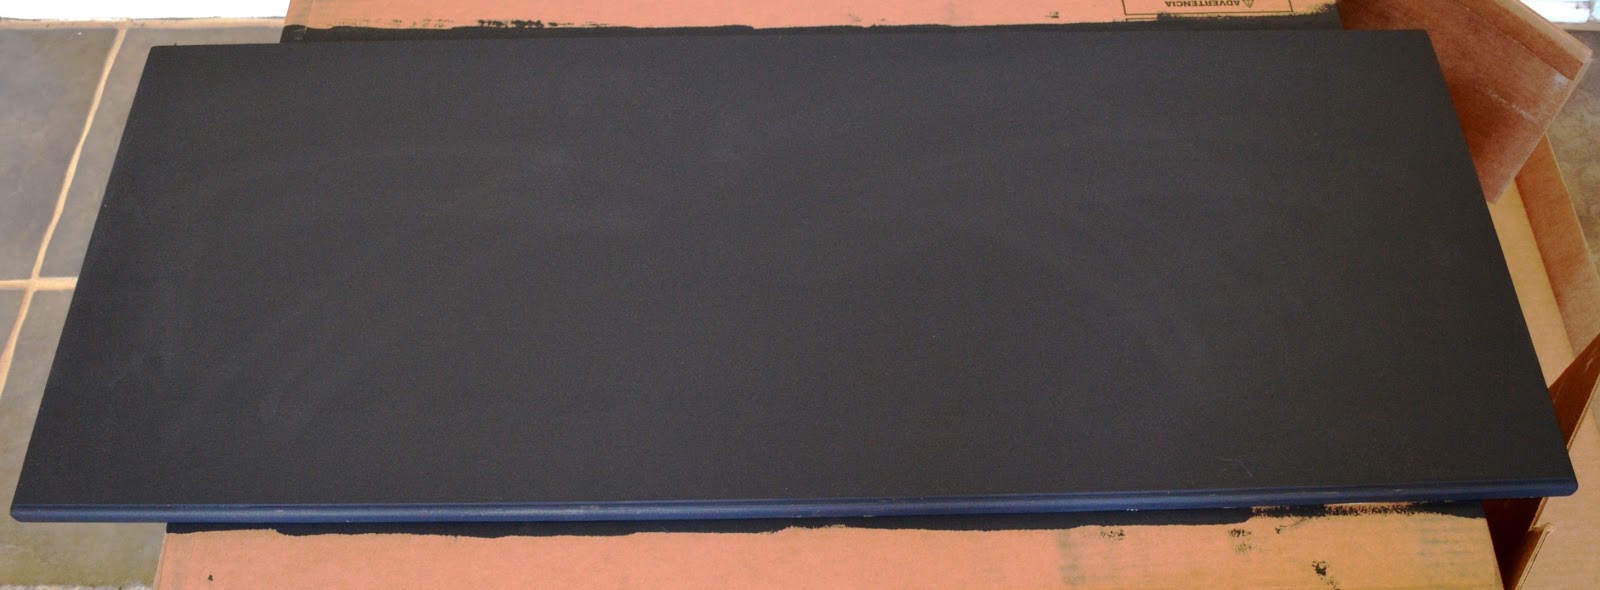
I spoke a little about this project in relation to my "built-ins" in our library.  We bought a hutch from Overstock with a wooden counter top ...wood was not fitting into my ideas for this room as we're going with yellows, turquoise/aqua, silvery/nickel metals, and white.

In comes a faux finish that resembles granite.  I have to say that it looks pretty danged good.  Now, I have to preface that by saying, Mr. Hollybroke is not the most creative/crafty man, but we put him in charge anyway to do the "painting".  It looks awesome.  I'll quickly go through the steps, because if you think you can't do this, you absolutely CAN.  If my husband can do it, then anyone can (not to say he doesn't have talents elsewhere, just not when it comes to crafty home projects).

Here's what he did:

Supplies
Granite kit (see below)
Counter top
Scrap Cardboard
600 grit sandpaper (painting section of the store)
Papertowels or a rag


1.  Get a counter top that you want to paint (wipe with water to make sure it's clean).


2.  Buy this : Giani White Diamond Granite Paint Kit for Countertops - it seems pricey, but if you compare it to the cost of a granite counter top, even one this small, it's negligible.

3.  Prime the counter top with the primer and primer brush (if your wood is not pre-finished then you must sand it first to get it smooth).  Let this dry.


4.  Lightly sand with 600 grit sandpaper, wipe clean

4.  Take the provided sea sponge and get it good and wet, then squeeze it out and let it dry.
                         A.  Practice the dotting/spotting on a piece of cardboard to get a feel for the paint.

5.  Apply the various colors included in the order that they are numbered...unfortunately Mr. Hollybroke didn't take a picture between each color, but they provide you with a sea sponge and paint that is numbered.  You must sand with the 600 grit sandpaper between each coat and remember to wipe it clean.


6.  Apply the clear coat. 

7.  Sand with 600 grit sandpaper.

8.  Repeat steps 6 & 7, two MORE times.  Your final sanding is very light.


Tips
  • Make sure to get around all the edges
  • When you wipe the sanding off, use some water to pick up debris
  • Once you start priming or clear coating, do not stop because it dries quickly
  • Be patient with the stippling and the drying, it will be worth it

Here's the hutch in all her glory (and filled up with our stuff):


Apr 17, 2013

WiP Wednesday - Serriform Shawlette FO

All done....I really did like this pattern, simple enough to watch TV with enough design to keep my mind working.  The yarn was truly a perfect match for the pattern and I very much enjoyed this knit.  I have not yet blocked this and I have no idea when that could possibly happen.

I hope you enjoy my little, aspiring, knit model...


Pattern: Serriform Shawlette
Yarn: Madelinetosh Tosh Merino Light in Burnished; ~327 yds
Needles: US5 - 3.75mm
Made For: Unsure for now
Notes:  I took all precautions to make sure I would have the right amount of yarn to finish, but still I was wrong.  I have way too much yarn left and a shawl that is not as big as I was hoping.  I really thought I had it figured out this time....one day I will prevail.

Ravelry Project Page
Part of the Mad About Tosh Club from Twisted.

Next week I will show my  new WiP.

Jan 25, 2013

Ribbit Cowl Project - FO

I have completed yet another cowl, and like the others, I plan to have it available in my Etsy store. It's an improvised design, as I couldn't find something as simple as this. I hesitate to write out what I did, in case I missed something in my pattern quest. I will include it here for now, but if someone feels that I've swiped their pattern, then I will have to take it down.


Sorry for the yucky iPhone picture....

Pattern: My own improvisation (Ribbit Cowl)
Yarn: Crystal Palace Yarns Kaya - Spice Market (110 yds total)
Needles: US10 (6.0mm)
Made For: Etsy Store
Notes: I cast on  80sts, placed a stitch marker, and joined to form a circle.
Next I knit 5 and purled 5 around
I continued this until my cowl was approximately 8 inches tall and loosely bound off with a size 11 needle
Ravelry Project Page


Dec 5, 2012

Rounded - Free Pattern

I wanted to create something that could be made quickly and easily modified.  This pattern is fast and relatively easy.  The name of the pattern is "Rounded".  I realize that it's not very imaginative, but I used up all that energy in the design phase.

It can be used in many different size yarns and hooks to get different size “motifs”. With a worsted weight yarn and ‘I’ Hook, I made something big enough to be a trivet or a dishcloth.

I have editted this pattern myself, so if there are any errors, please send me a note and I will correct the pattern.


In the attached photo, I have used two different color yarns, but this is not included in the pattern, as I did this more for a tutorial effect. I think it makes it easier to see the different rounds.

PDF Download

Ravelry Link


Dec 4, 2012

Another Cowl FO - GREAT Pattern

Just popping in quick (as I'm in the midst of packing up my home) to let you all know about a great pattern that I came across on Ravelry.  It's crochet (so much faster than knitting), FREE (!!), and really easy.  If you're in need of a last minute gift for Christmas or just in general, this is perfect.  It took me, literally, two hours (I crochet fast).

One more thing, if I have some time today, I will release my new pattern.  It's free and pretty easy to whip up as a nice gift for someone, last minute.


Pattern: Catesby Three-Hour Cowl by Kathryn Jones
Yarn: Red Heart Super Save Economy in Sandy Print
Hook: K Hook
Made for: Etsy Store
Notes: This cowl was super easy and super fast.  I think I can churn out some of these for my Etsy store.  My only caveat is to not use a worsted acrylic, only because it doesn't drape well enough.  I'm thinking a larger hook (with less chaining) to get the drape.  One more thing, it's written in British terms (this is well noted in the pattern).